Articles
How to Organize Receipts in a Binder: A 2026 Business Guide
Receipts tend to pile up in the same places. A glove box. A tote bag. A desk drawer. The side pocket of a laptop case. By the time tax prep starts, the problem usually isn’t whether you kept receipts. It’s whether you can find the right one fast.
A binder still works because it’s simple, visible, and hard to ignore. You can flip through it like a book, hand it to a bookkeeper, and pull a receipt during an audit without digging through a box. The mistake most businesses make is stopping there. They buy a binder, toss receipts into it, and call that organized.
The better approach is a paper system with rules. Then you pair it with a lightweight digital log so the binder stays useful instead of becoming a prettier shoebox. That’s how to organize receipts in a binder in a way that holds up under real business pressure.
Gathering Your Receipt Organization Toolkit
A receipt binder fails in slow, predictable ways. Rings stop closing cleanly. Tabs curl. Thin pockets split at the seam. Then one coffee-stained thermal receipt slips out, and you find out months later when you need it.
That is why the setup matters. Business records often need to be kept for years, so cheap supplies create repeat work. I would rather spend a little more once and have a binder that still works at year-end, during tax prep, and when someone asks for backup on a charge from six months ago. The paper system should also support your digital one. If you scan receipts into Booksmate or another workflow, clean labels and consistent pages make the digital side faster too.
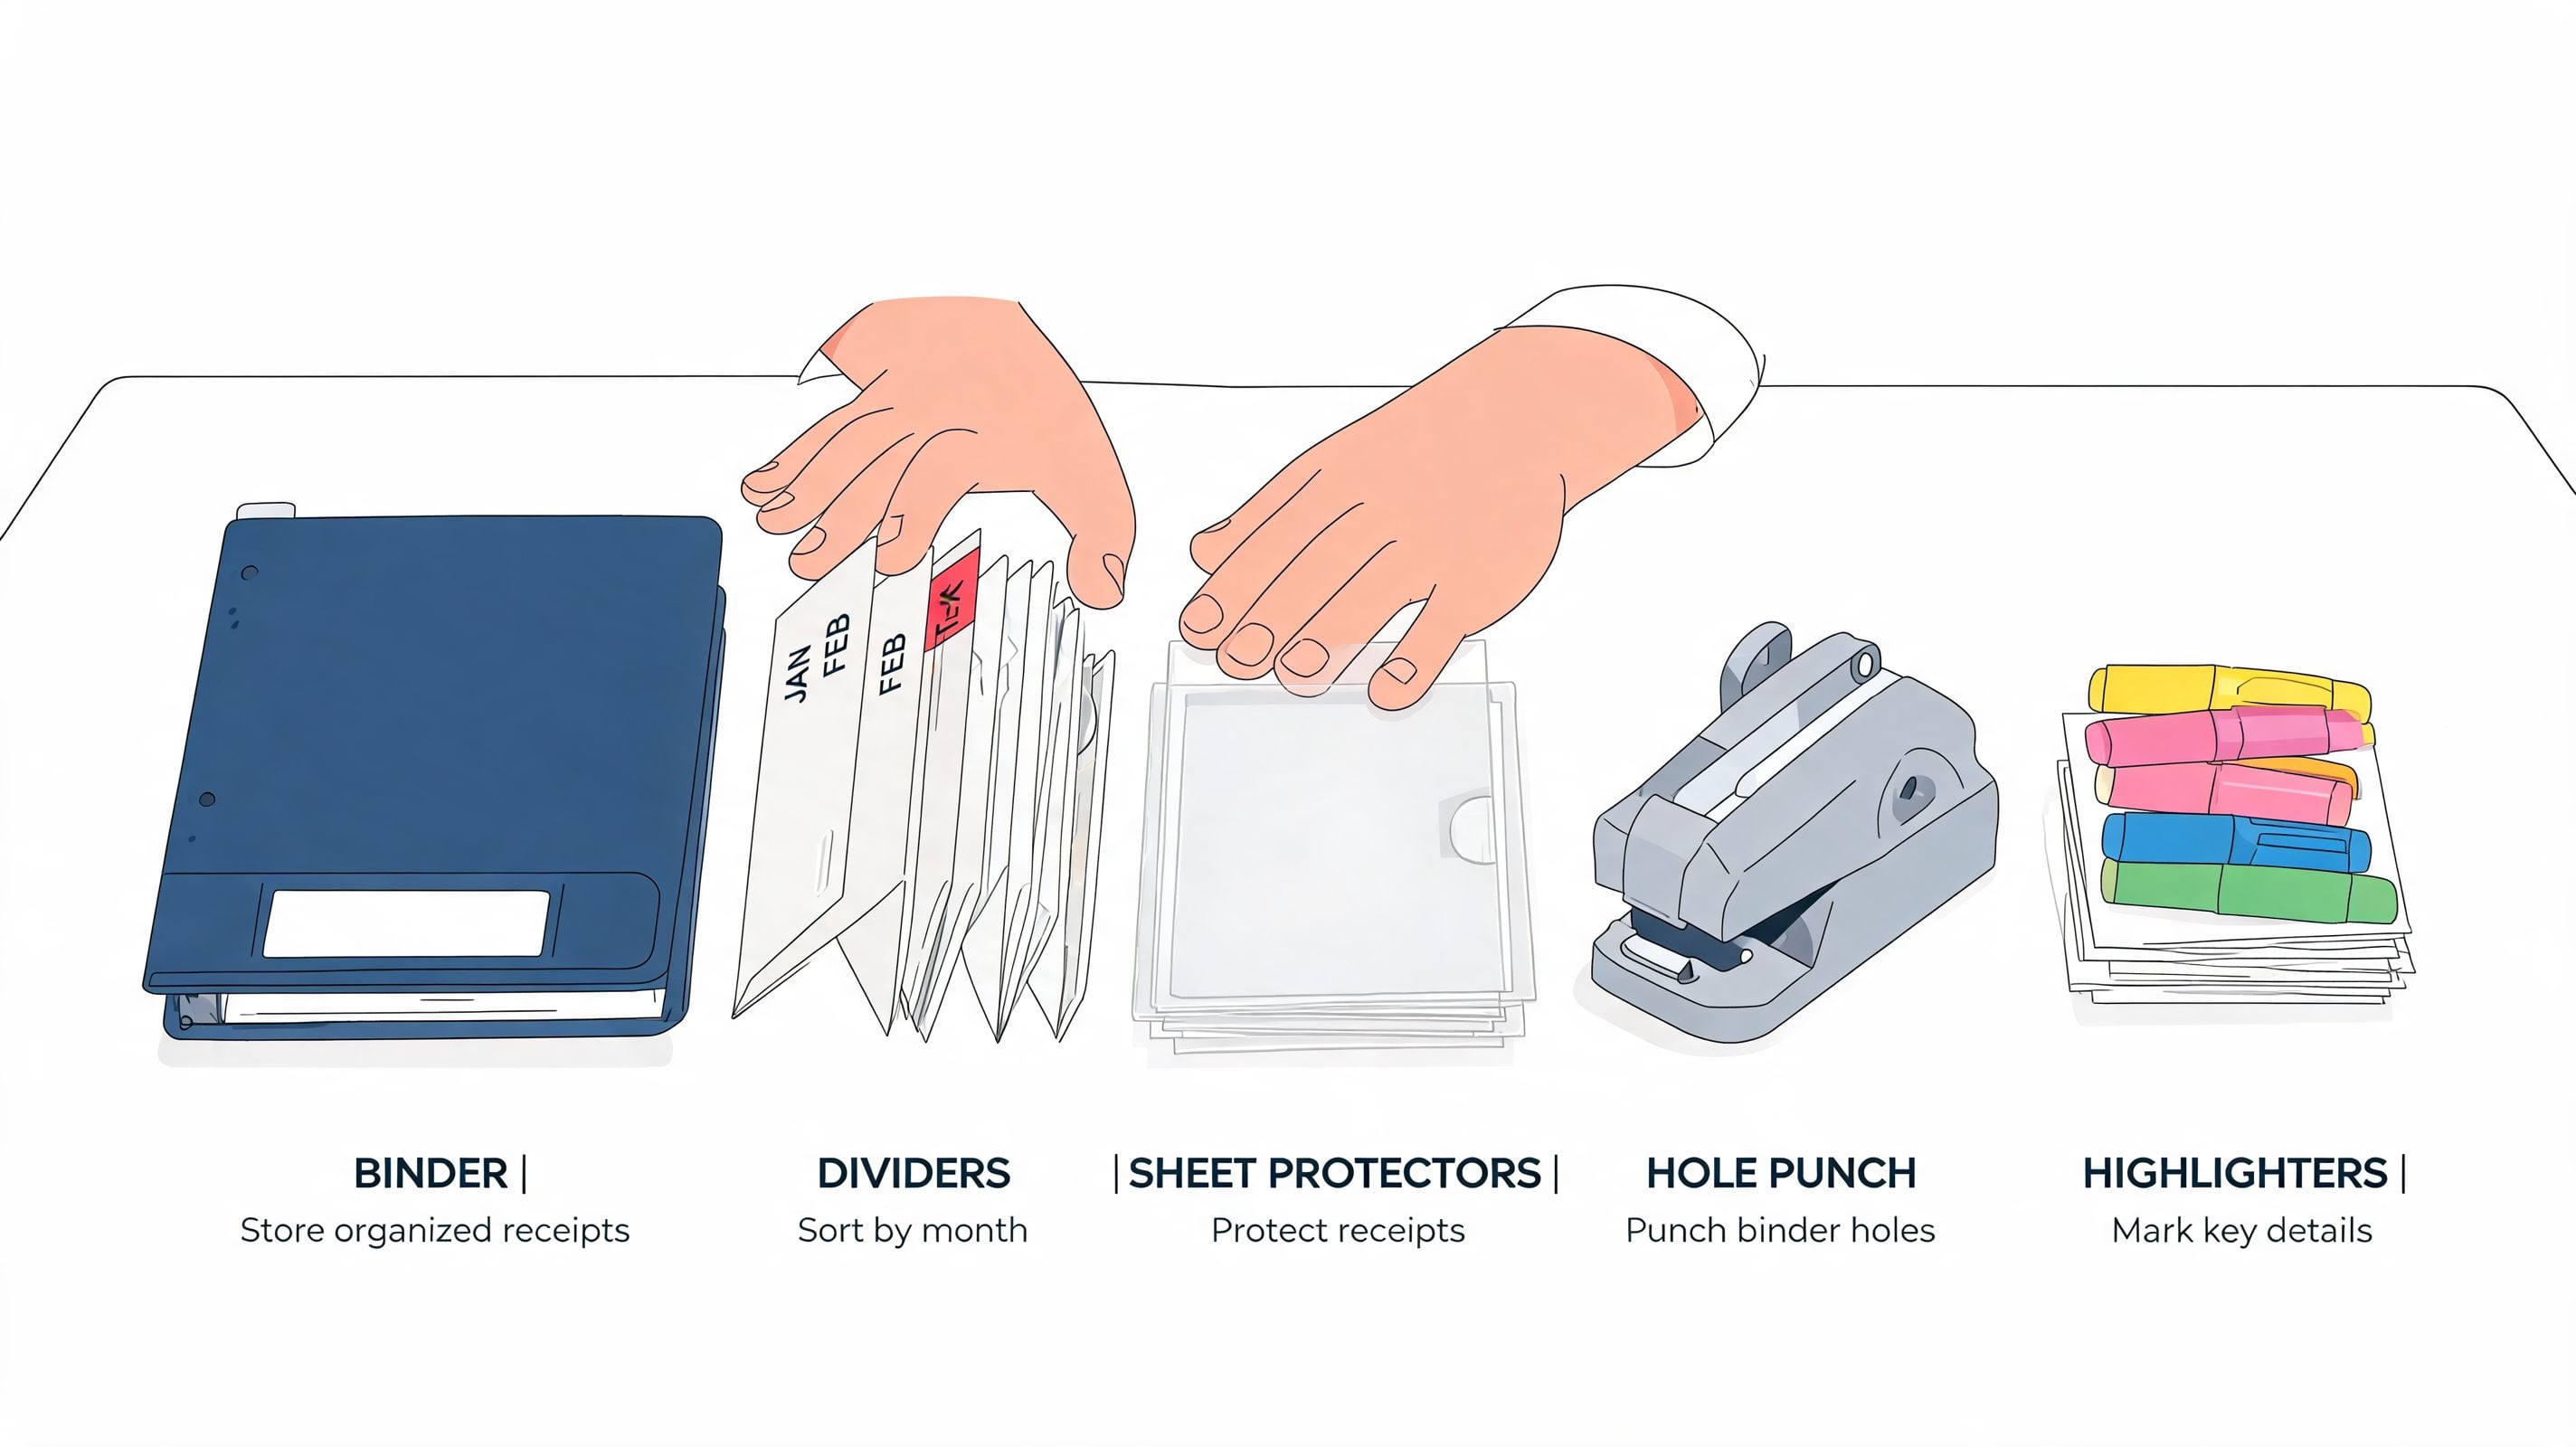
What to buy first
Start with a small set of supplies that can hold up to regular use:
- A heavy-duty three-ring binder. A durable one that can hold 275 sheets is a solid baseline for many small businesses, especially for a yearly file with supporting documents.
- Tab dividers. An 8-tab set gives you enough flexibility for your core sections plus a few catch-all areas for overflow, reimbursements, or items waiting to be matched.
- Heavyweight sheet protectors. Use these for thermal receipts, folded receipts, and anything likely to tear.
- A good hole punch. A misaligned punch turns filing into a chore.
- Letter-size paper. Tape or staple small receipts onto full sheets so they file cleanly and scan better later.
- Labels or a label maker. Printed tabs are easier to read, easier to standardize, and easier to match to a digital folder structure.
- Highlighters or a fine-tip pen. Mark the business purpose, client, job, or reimbursement status before the details fade.
What works better than the bargain-bin version
Paper dividers can work in a low-volume office. Plastic dividers with pockets hold up better if you handle a lot of fuel receipts, parking slips, or folded invoices.
The same trade-off applies to sheet protectors. Thin protectors cost less up front. Heavier ones save time because receipts stay flat, stay visible, and stay in place. If your desk is already overloaded, it helps to first declutter your paper mess so the binder gets a fixed home instead of drifting into a pile.
Practical rule: If the system falls apart on a rushed Friday afternoon, it was never organized enough.
One binder or several
One binder per tax year is enough for many small operations. Once volume picks up, split the paper file in a way that matches how you retrieve records. I usually see two workable options: one yearly binder for all expenses, or separate binders for general expenses and high-paper categories such as travel, job costs, or card purchases awaiting reconciliation.
The right choice depends on retrieval speed, storage space, and how often you hand records to someone else. A single binder is simpler. Multiple binders reduce crowding and make scanning batches into Booksmate easier because each stack already has a clear purpose.
The goal is a paper record you can trust and a digital process that saves time instead of creating another inbox of files.
Choosing Your Binder Indexing System
The indexing choice decides whether your binder saves time or creates friction. Most workable systems fall into two camps. Monthly indexing and category indexing.
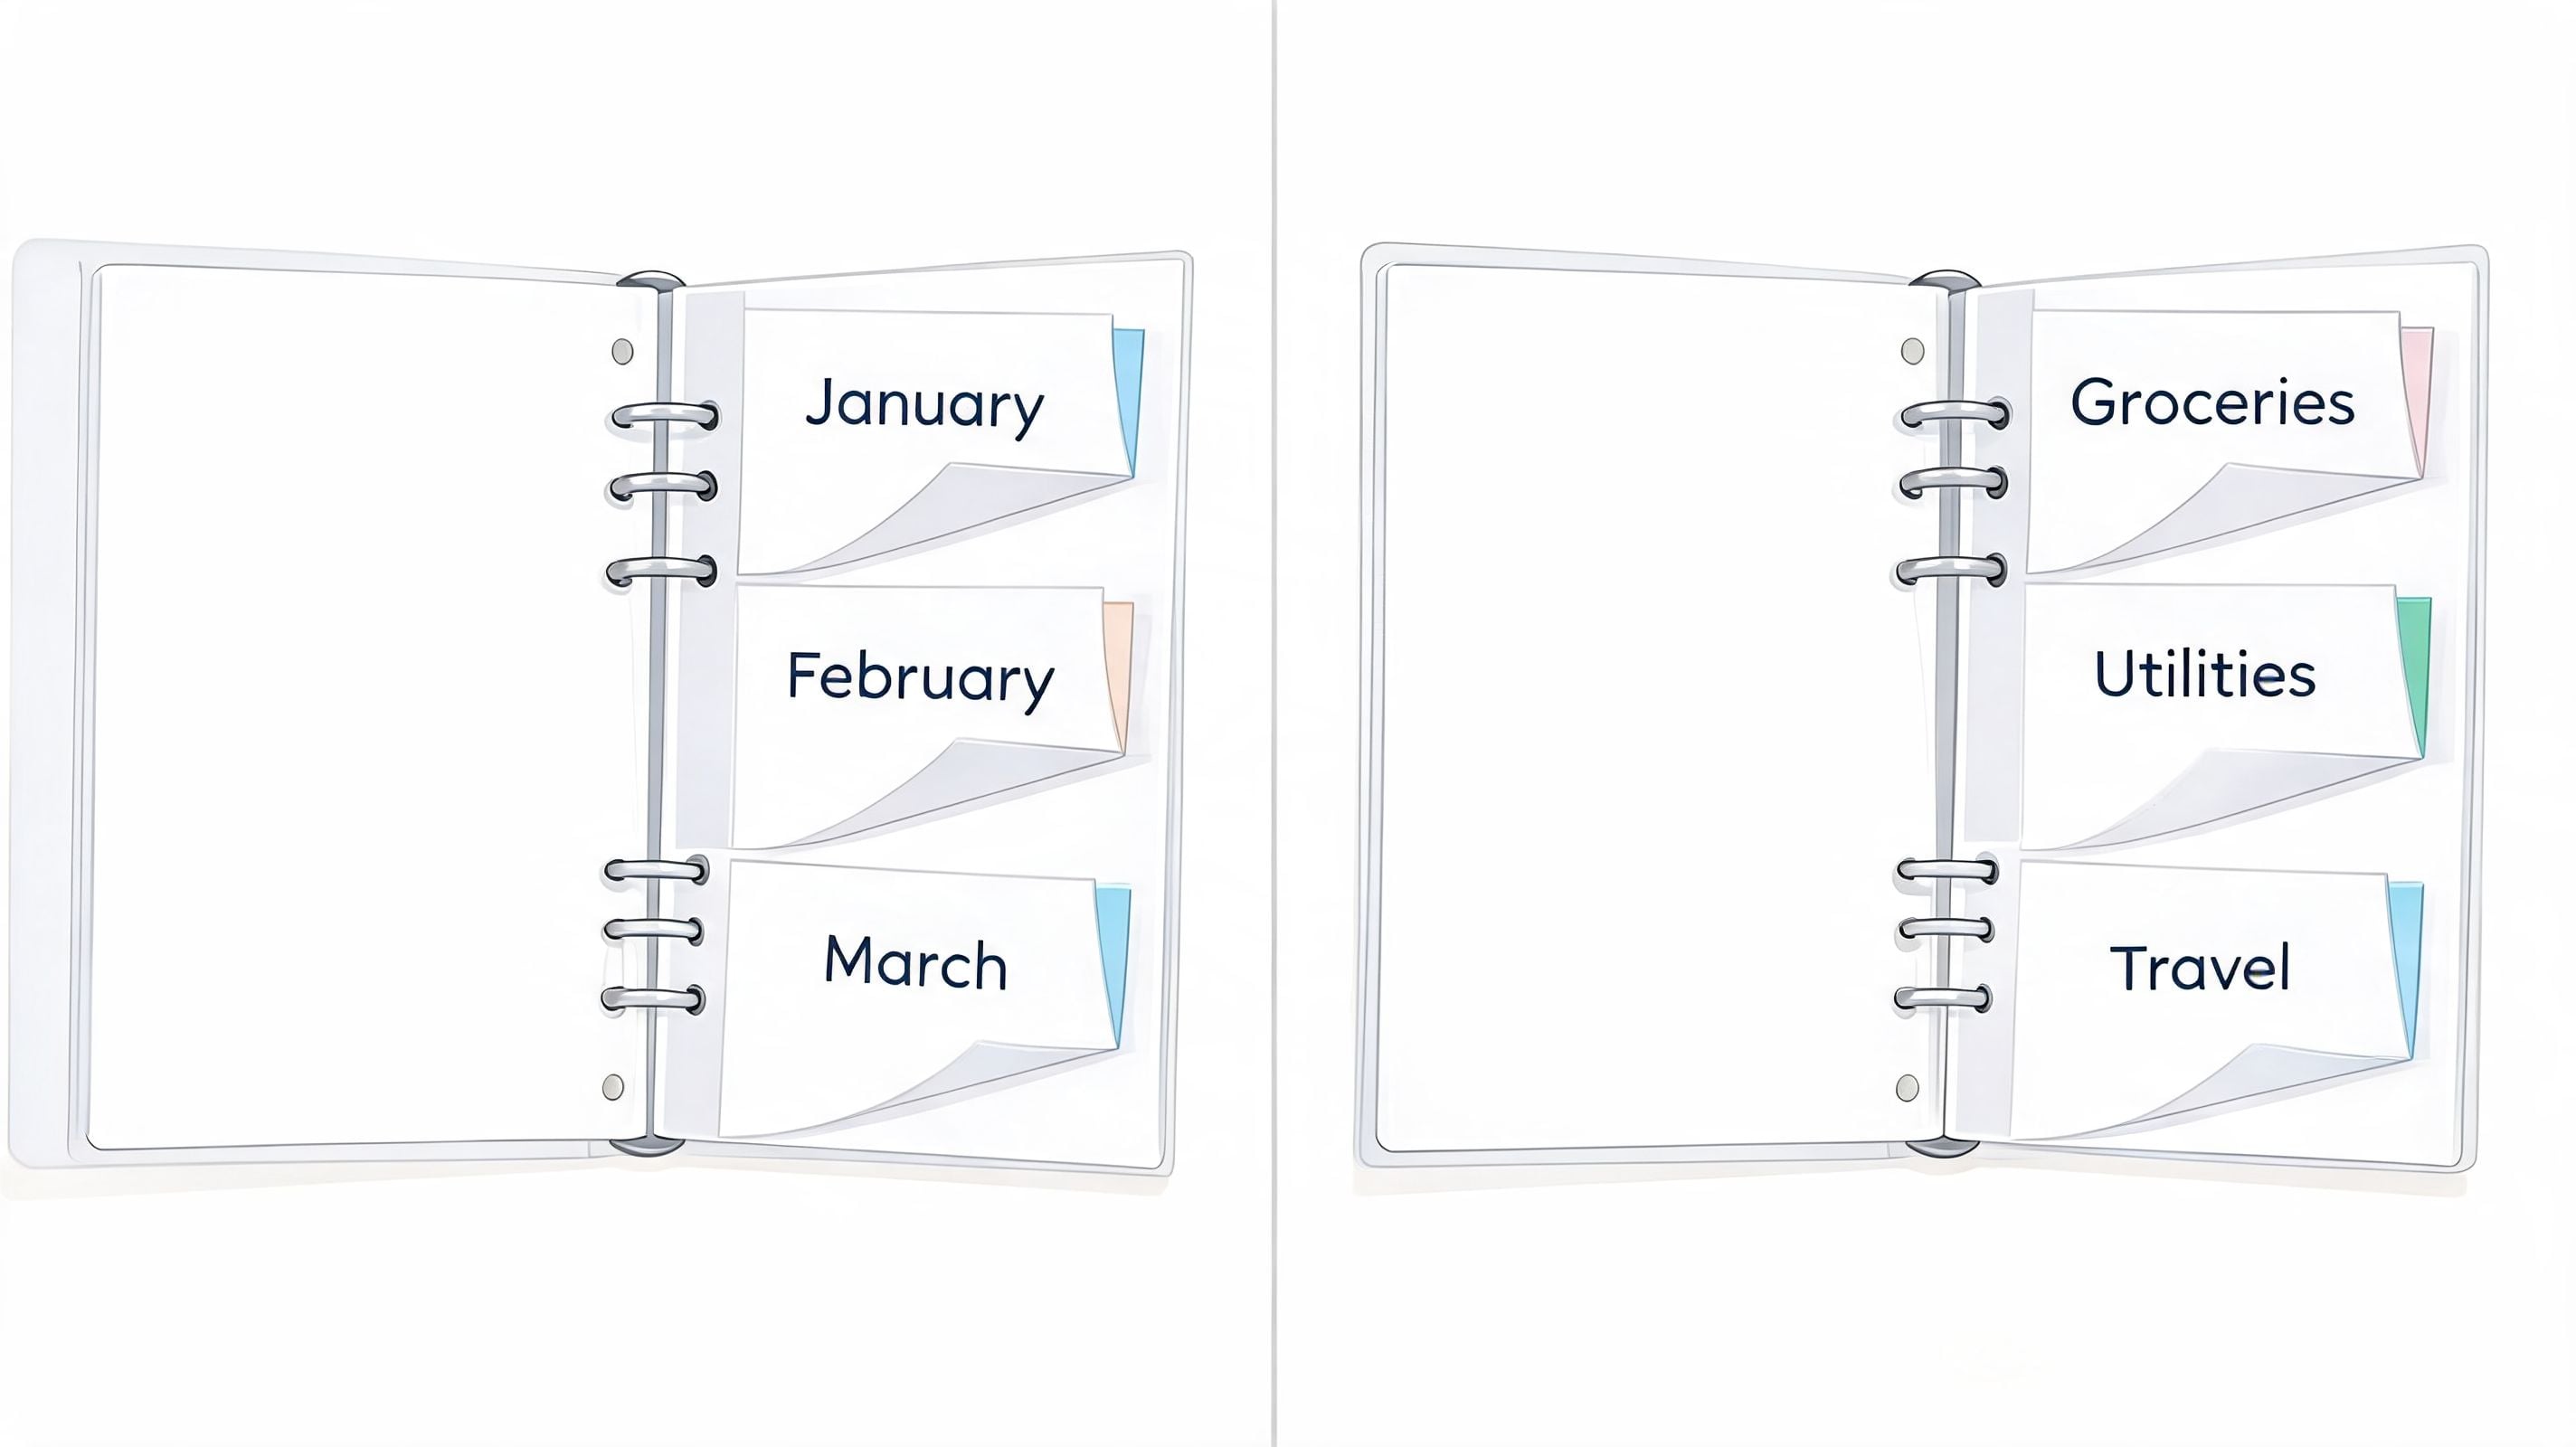
If you pick the wrong one for your business, the binder will still look organized while making everyday work slower.
Monthly tabs
A monthly binder uses 12 monthly folders or dividers labeled January through December. This setup is easy to understand and easy to maintain. It also pairs naturally with statement reconciliation because you’re matching receipts to the month they cleared.
This works well for service businesses, solo operators, and owners who mainly want a reliable year-end archive. If your expenses are fairly straightforward, monthly filing keeps the habit simple.
Category tabs
A category binder groups receipts by expense type instead of date. Think travel, supplies, meals, software, contractor costs, or equipment. This method is faster when you regularly need to total one type of expense or support a deduction category.
Using category-based dividers can reduce expense retrieval time by 50 to 70% compared to unsorted methods, and common small business categories often include travel (20%) and supplies (25%) (Blue Summit Supplies receipt guide).
A monthly system is easier to feed. A category system is easier to mine.
Which businesses fit each system
Here’s the practical comparison:
System
Best fit
Main advantage
Main drawback
Monthly
Freelancers, consultants, small agencies
Easy filing and reconciliation
Harder to total one expense type quickly
Category
Retail, construction, trades, multi-cost businesses
Faster tax prep by deduction type
More judgment calls when filing
Hybrid
Businesses with mixed needs
Better retrieval for both month and type
Needs discipline to avoid overcomplication
Color helps too. If you use one color family for monthly tabs and another for supporting paperwork, you can streamline your desk organization without changing the underlying filing logic.
A quick visual example helps if you’re deciding between layouts:

The system I’d avoid
Don’t create too many tabs in year one. A binder with ultra-specific sections looks smart until staff start guessing where things go. Then receipts for the same vendor end up in three places.
Keep the first version broad. You can always split a crowded section later.
Your Monthly Receipt Wrangling Routine
Month-end is a lot easier when receipts are already halfway organized. The trouble starts when paper sits in a car console, a laptop bag, two desk drawers, and someone’s wallet until reconciliation day. Then a ten-minute filing task turns into an hour of sorting and guesswork.
The binder system works best with a simple rule. Every receipt lands in one temporary holding spot first, then gets processed on the same day each month. That rhythm is what keeps the binder useful year after year. It also makes the digital side easier if you use automation later, because clean paper records are much easier to scan, review, and match.
Start with one collection point
Pick one intake spot and make it obvious.
Use any of these:
- A desktop tray for paper receipts from in-person purchases
- A labeled envelope in your bag for travel days
- A small inbox basket near accounting paperwork
- A weekly transfer folder if several employees hand in receipts
Small thermal slips need extra care. Tape coffee receipts, parking stubs, and faded card-machine slips onto a full sheet of paper before filing them. If you skip that step, they curl, slide, and disappear. I learned that one the hard way.
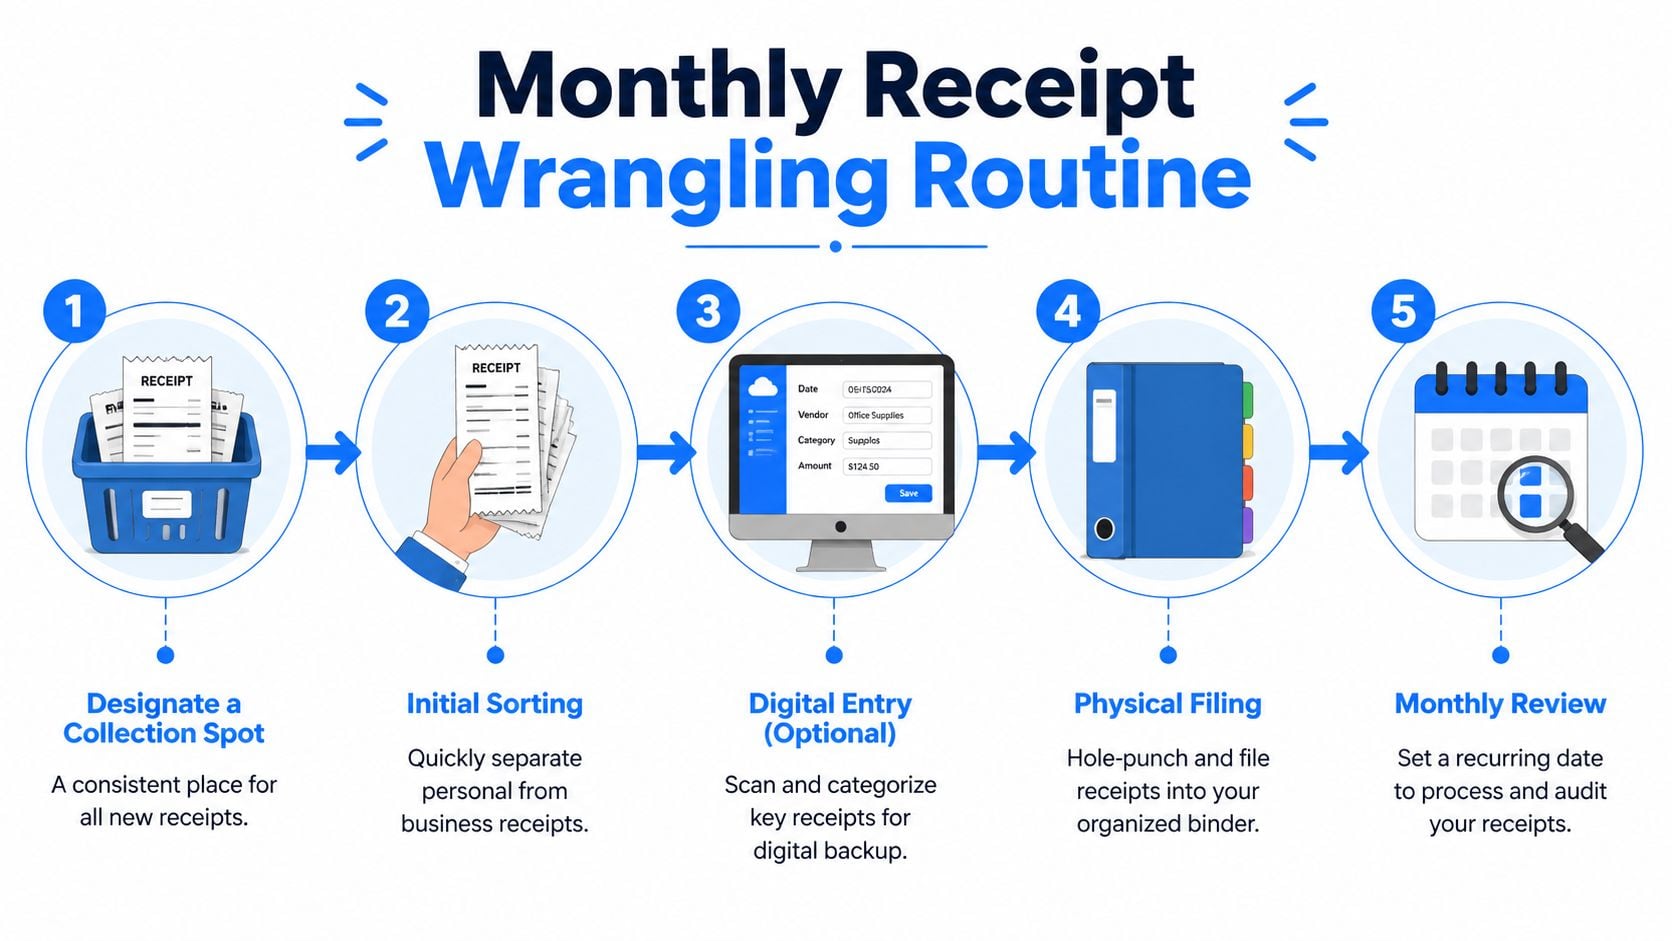
The monthly processing checklist
Block one recurring appointment on the calendar. Protect it like a client meeting. A binder stays tidy because the routine is fixed, not because the pile stays small.
- Empty the collection spotPull everything out at once. Half-finished filing creates leftovers, and leftovers are where missing receipts begin.
- Separate business from personalOwner-paid expenses, mixed purchases, and reimbursement items should be sorted before anything goes into the binder. Memory gets worse fast after a few weeks.
- Match each receipt to your indexFile by the monthly or category system you already chose. Keep the logic consistent for the full year so retrieval stays predictable.
- Add context while it is still freshWrite the business purpose on meals, travel, client purchases, or anything unusual. If the vendor name is unclear, note what was bought.
- File the paper and capture it digitally if neededPut receipts into sheet protectors or hole-punch sturdier pages. If you use Booksmate or another automation tool, scan or upload the same batch right after filing so the physical binder and digital record stay aligned.
That last step is where the hybrid method starts to pay off. The binder keeps the original proof in one reliable place. The digital copy gives you search, faster reviews, and less manual entry.
What to write on the receipt page
A receipt often proves the amount. It does not always explain the reason.
Add short notes such as:
- Client or project name
- Business purpose
- Who attended, for meal-related expenses
- Reimbursable or company-paid
- Any split between personal and business
If you can’t explain the purchase in one short handwritten line, attach a supporting note behind it.
What not to do
Avoid catch-up weekends. They usually lead to vague categories, missing dates, and receipts filed under the wrong month.
Avoid overstuffed sleeves too. A pocket full of loose paper is storage, not a working record system.
If you manage grants, board reporting, or program spending alongside normal expenses, keep that tracking separate from your main receipt binder. A free nonprofit budget template can help you track those numbers without turning the binder into a second spreadsheet.
Free Excel Templates for Expense Tracking
A paper binder stores proof. A spreadsheet helps you work with the numbers. That combination is practical because you can file the original receipt physically and still sort, filter, and total expenses without flipping through pages.
If you need a simple digital companion to your binder, these free templates are good starting points. For organizations that also manage program budgets, grant tracking, or board reporting, a separate free nonprofit budget template can be useful alongside receipt logs.
Free Excel expense spreadsheet templates
Template Name
Best For
Download Link
Smartsheet Simple Expense Report
Employee reimbursement and basic tax-deduction tracking for individuals or small teams
Download Smartsheet Simple Expense Report
SpreadsheetPoint Travel Expense Tracker
Travel-heavy businesses that need hotel, meals, and mileage fields
Download SpreadsheetPoint Travel Expense Tracker
Vertex42 Expense Tracker with Budget
Owners who want expense tracking tied to budget monitoring
Download Vertex42 Expense Tracker with Budget
Part Time Money Monthly Expense Tracker
Daily logging and monthly cash flow review
Download Part Time Money Monthly Expense Tracker
How to pair a template with your binder
The easiest setup is to mirror your binder logic in the spreadsheet. If the binder is monthly, use monthly tabs or date sorting in Excel. If the binder is category-based, keep the same categories in your spreadsheet columns.
That one-to-one match cuts confusion. When someone asks for a receipt behind an entry, you know exactly where to look.
Keep the spreadsheet lean. Track date, vendor, category, amount, and a short note. The binder already holds the backup detail.
The Hybrid Approach to Bulletproof Record Keeping
Paper-only systems eventually hit a wall. They’re dependable for storage, but they don’t scale gracefully when receipts come from card swipes, vendor portals, email inboxes, app stores, and marketplaces all at once.
That’s where businesses start feeling binder fatigue. For high-volume businesses, 62% of bookkeepers report binder overflow as a top frustration, and traditional binder advice often doesn’t address operations handling 1000+ monthly receipts (YouTube discussion on binder overflow and hybrid systems).
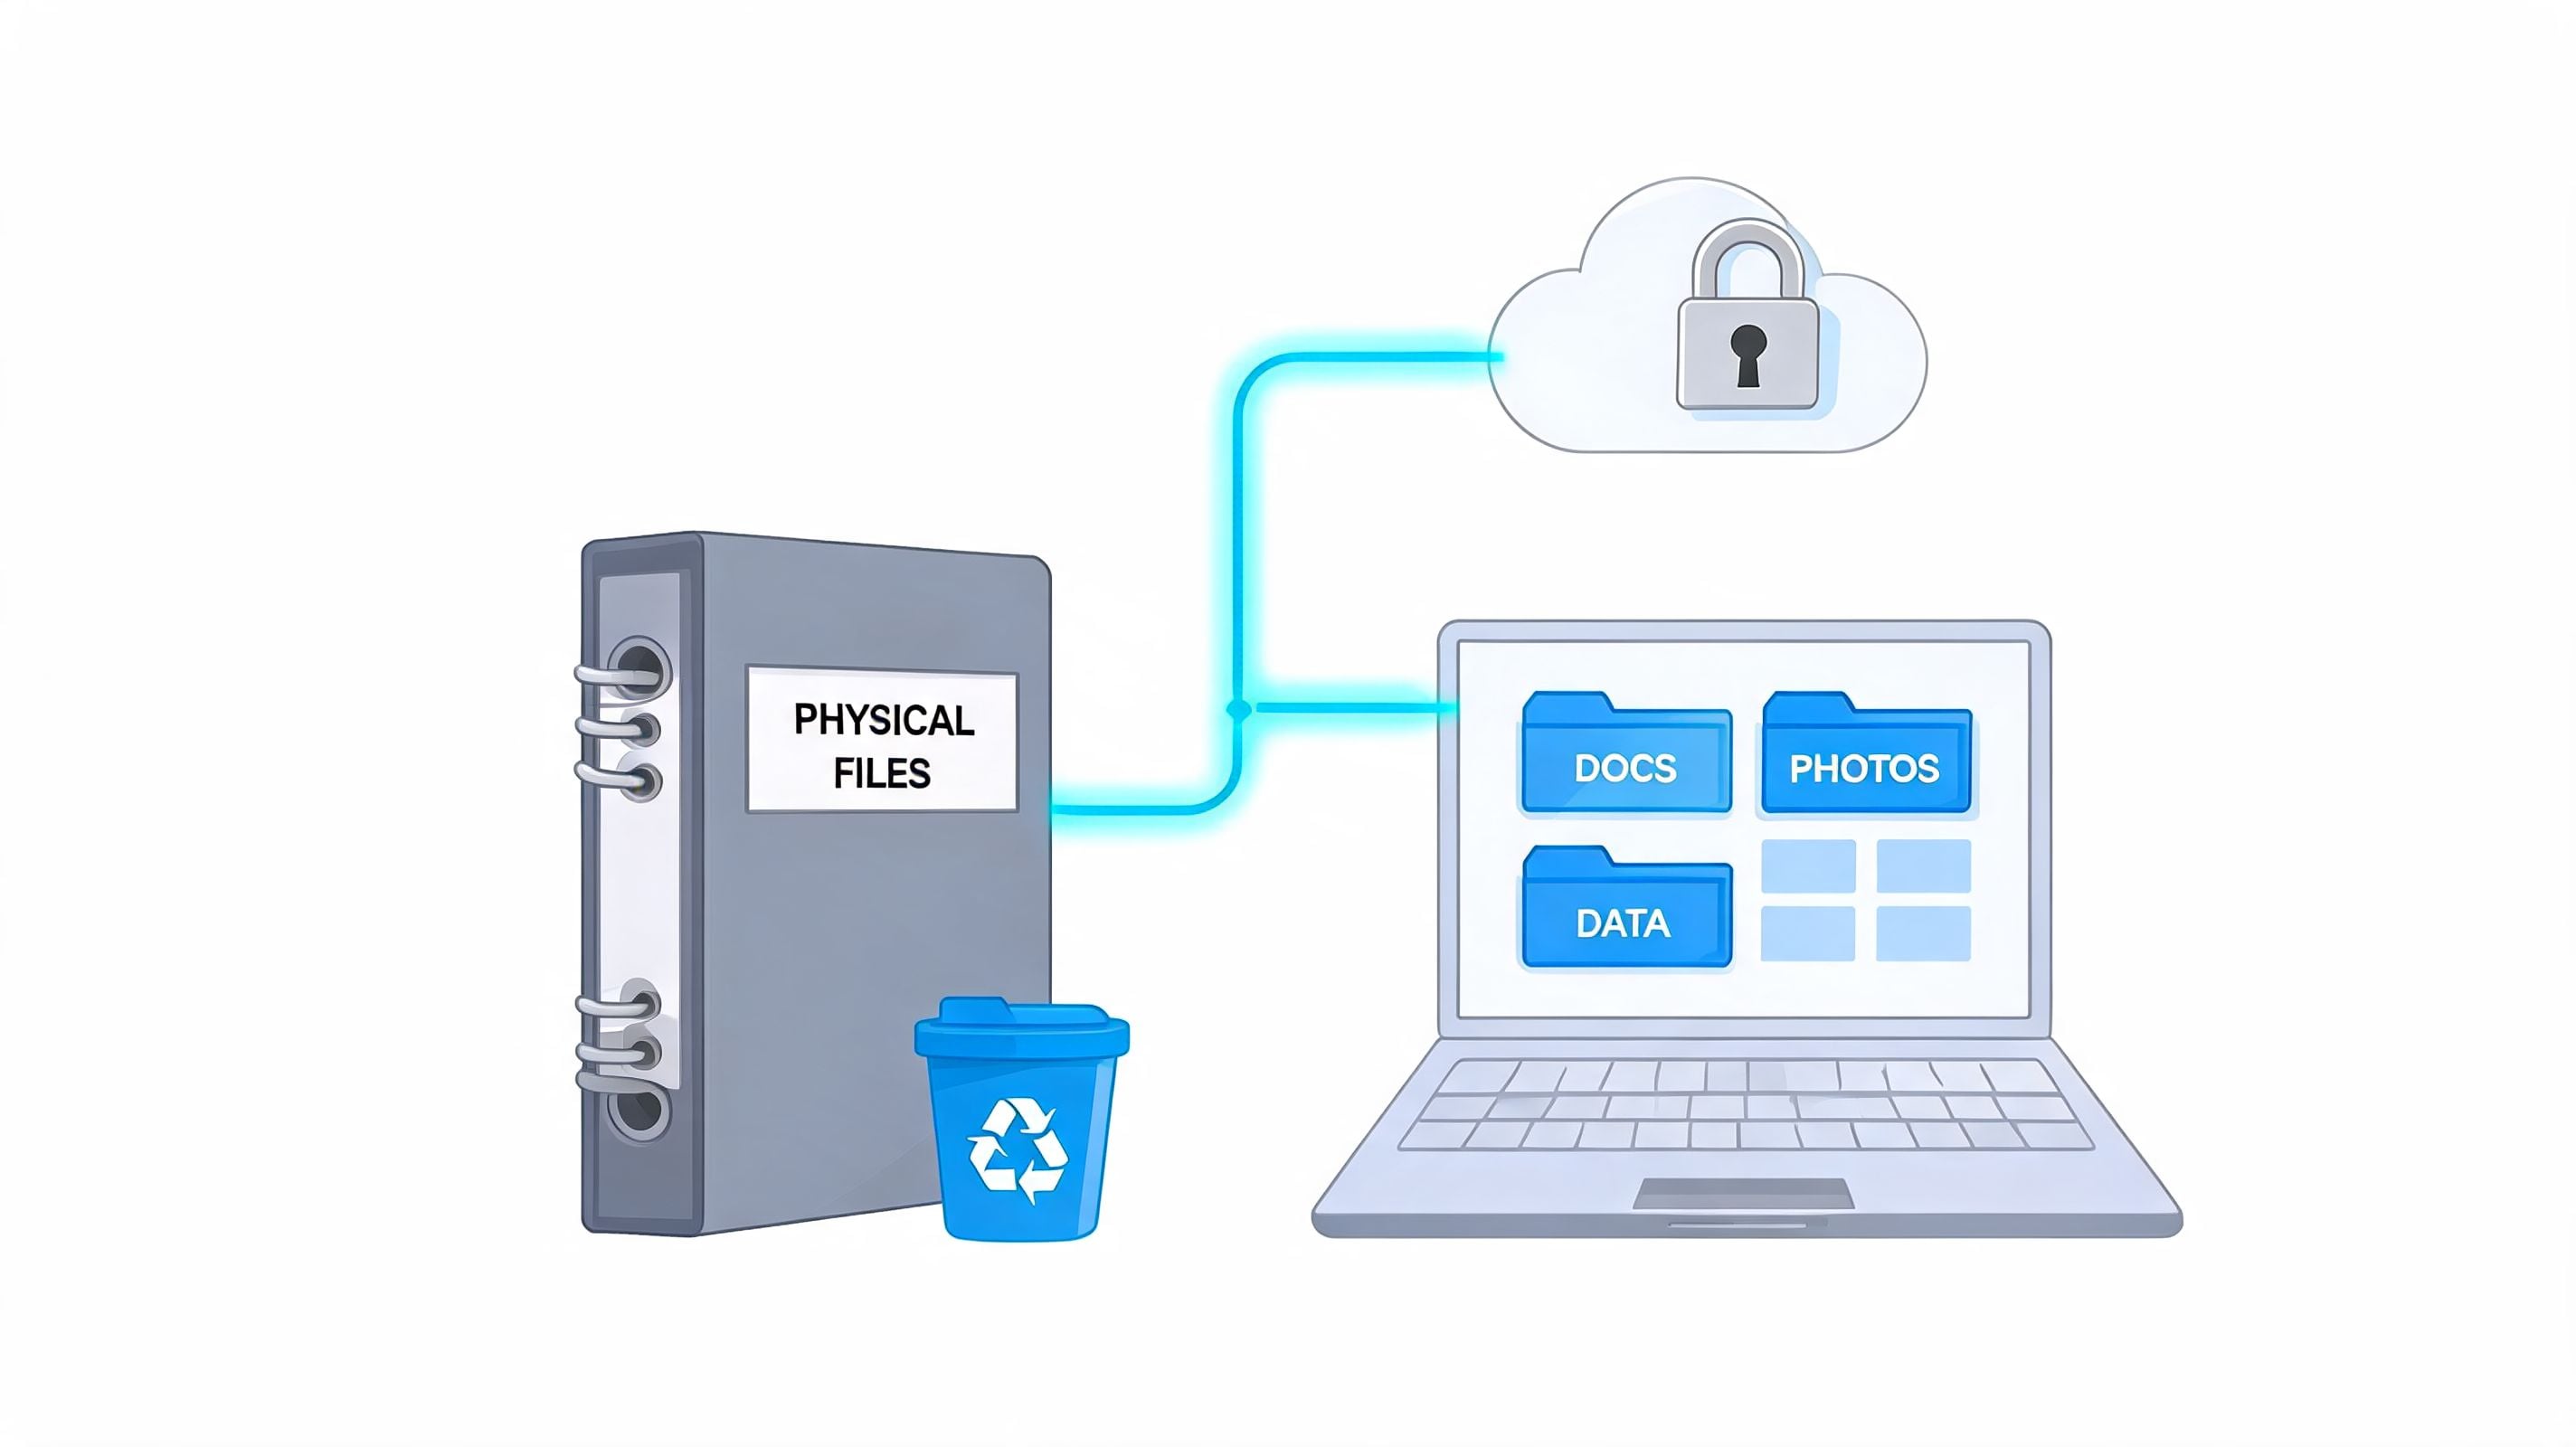
What the binder still does well
A binder remains excellent for:
- Physical backup when you receive paper originals
- Audit presentation when someone needs chronological proof
- Team handoff in offices that still review paper
- Long-term archive for receipts that belong with signed documents or other records
The problem starts when you ask the binder to do everything. It can’t fetch invoices from portals. It can’t search by vendor. It can’t extract line items into your accounting workflow.
What a hybrid system fixes
A hybrid process keeps the binder as the final paper archive while digital tools handle intake and organization upstream. That means you capture documents as they arrive, organize the data digitally, and only print or file what belongs in the permanent paper record.
In practice, that looks like this:
Task
Paper binder
Digital workflow
Incoming paper receipt
Store and archive
Optional scan for backup
Email receipt or portal invoice
Poor fit
Collect and organize automatically
Searching by vendor or date
Slow manual flipping
Fast dashboard filtering
Export to accounting software
Manual re-entry
Structured digital export
A practical cutoff point
If you’re filing a modest amount of paper each month, a binder-first process is still manageable. If your business receives receipts across many channels, make the binder the backup, not the engine.
That shift changes the workload. You stop using paper as your intake mechanism and start using it as your confirmation archive.
The strongest record-keeping setup isn’t paper or digital. It’s paper for certainty and digital for speed.
A good binder gives you confidence. A good digital workflow gives you back your time. Together, they create a system that stays usable as the business grows.
If your team is tired of downloading receipts from portals and inboxes by hand, Booksmate is worth a look. It automatically fetches invoices and receipts from supported portals and email sources, extracts the key data with AI, organizes everything in one dashboard, and prepares it for export to accounting software. That lets you keep the binder as your clean physical backup while the daily collection work happens in the background.